
Let me start by saying that I have never had authentic kimchi.
Living in Montana, we have to make certain concessions because of our remoteness and smaller immigrant community. I don't know as any of the cities we have visited have Korean restaurants, and we aren't planning to visit the Pacific coast anytime soon. I have tried kimchi from the grocery store and found it bland, uninspired, and well...obviously Americanized. It didn't have all of the flavors I had read about, making me think it just wasn't right. After some research and experimentation I came up with this recipe based on combining and testing several online recipes. I call this "Redneck Kimchi" because I have sometimes had to make substitutions for some of the ingredients. I hope you will find that these are a bit more readily available than some of the specialty items called for in traditional recipes.
In the course of my research I learned that this is nothing new. There are as many flavors of kimchi as there are Korean mothers making it. I encourage you to experiment yourself, find the flavors you like, and go for it!
I have noted my substitutions with an asterisk.
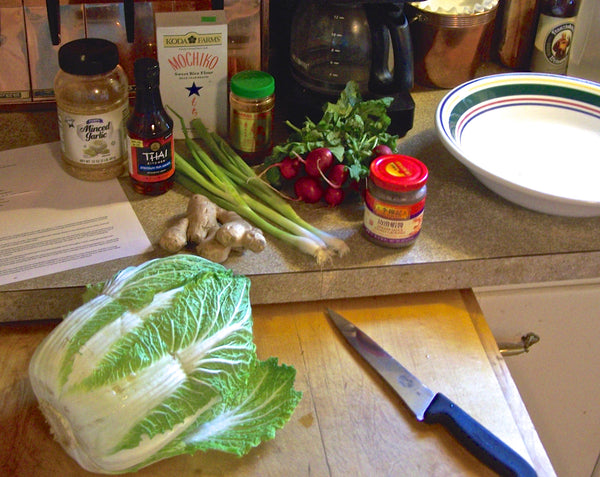
Vegetables:
1 large or 2 small napa cabbages, 5-6 pounds *I have also used green cabbage
2 cups daikon radish cut into matchsticks *one bunch of standard red radishes
1 cup of carrots cut into matchsticks
7-8 greens onions cut into 1 inch pieces
1 cup chopped chives *or just use more green onions
1/2 cup sea salt or canning salt
Sauce:
2 cups water
2 T sugar
2 T sweet rice flour
Seasoning:
1/2 cup minced garlic
2 t minced ginger
1 medium onion, minced
1/2 cup fish sauce
1-2 cups gochugaru, Korean red chili flakes *you can also use any mildly spicy and fragrant chili, ancho, guajillo, and plain old red pepper are good substitutes
*Optional 1/8 cup shrimp paste depending on how funky you like it
Tools:
2 large bowls (I use steel or Pyrex) 2 colanders, small saucepan, fermenting containers (I use 4 quart sized canning jars, freshly washed and dried) small weights that will fit into your jars, a baking tray with a high wall, a chopstick, and gloves, I really recommend the gloves!
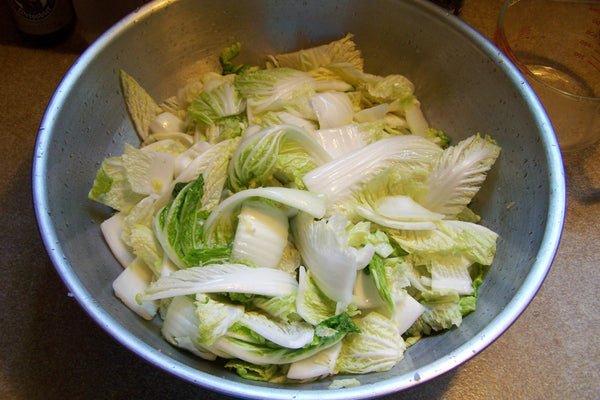
Preparing the cabbage:
Cut your cabbage into quarters, removing the cores from each. Then cut crosswise so that you have roughly 2" square pieces. I like my leaves loose, not still attached, I find it easier to serve.
Place your cabbage into a large bowl and apply a half cup or so of sea or canning salt. You want to squeeze and massage the salt into the leaves. Work your way through the leaves to ensure they have all been salted. Let them rest for at least two hours, coming back every so often to turn and rub. You are ready to rinse when the thick base part of your leaves bend easily. Rinse well in your colander, and let them drain.
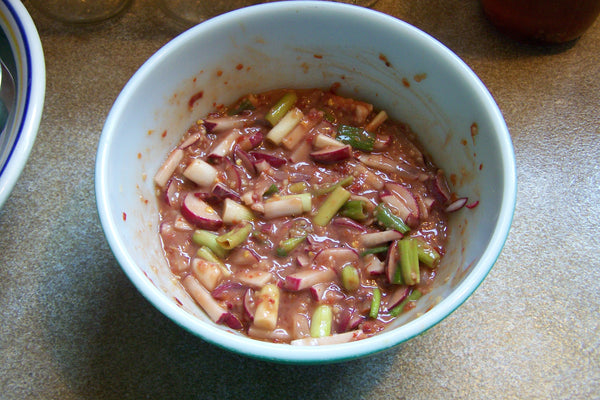
Sauce:
While your cabbage drains, start prepping the sauce. Heat 2 cups of water in a small suacepan and add the sugar to dissolve. Once it starts to steam add in your sweet rice flour, stirring constantly to mix. You won't need to simmer it long, just be sure to stir. Once it thickens to a thin paste, allow it to cool.
While it is cooling chop all of your other ingredients and add them to a large bowl. Pour the cooled sauce over the top, mix well, and let it sit for at least 1/2 hour.
Assembly:
Once your cabbage has drained thoroughly, set out your canning jars or other container and put your gloves on.
A few handfuls at a time, bathe the cabbage in your sauce mixture, get it good and goopy! Then place in one jar at a time, pressing down to get out air pockets. Once they are full I run a chopstick down the sides of the jars anywhere I can see air bubbles.
Place your jars into a baking pan to catch any overflow, and place a weight in each jar to keep your goodies below the level of the liquid. Press down gently until no remaining air bubbles rise to the top and all veggies are submerged. I use my Japanese teacups as weights, they fit perfectly in the mouths of jars, but leave a little space for gases to escape.

Fermenting:
I leave my kimchi out at room temperature for up to 5 days. During those days, check the jars for bubbles. Bubbles let you know that fermentation is happening. I will occassionally press on my weights to see how much gas is rising. Feel free to taste test as it ferments so you can control the level of sourness. Once you like the flavor thoroughly clean the outsides and lips of your jars if you've had any overflow. Then put the lids on the jars and put them in the fridge. This slows down fermentation, but doesn't completely stop it, so I do not fully tighten the lids to avoid explosions. You can also burp your jars once a day for the first few days to ensure you won't have a buildup of gasses. While you can start eating it right away, I recommend giving it at least a week for the flavor to improve. It should keep well for months.
Warning:
Once you've had your own homemade kimchi, you'll probably never stop making it! It goes well with almost everything: It's a cooling salad with spicy dishes, and a spicy inferno with mild dishes. Truly a wonder food, and probiotic, so it's good for you too!
